


I've been tagged
I've been tagged by Nicola from http://gorillamamagreats.blogspot.com/ in the Middle Name Game!
These are the rules:
You must post the rules before you give your answers.
You must list one fact about yourself for each letter of your middle name. Each fact must begin with that letter. If you don't have a middle name, just use your maiden name.
After you've been tagged, you need to up-date your blog with your middle name and answers.
At the end of your post, you need to tag one person for each letter of your middle name.(Be sure to leave them a comment telling them they've been tagged and need to read your blog for details.
My middle name is Sue so here goes.
S - Is for Sons, Stamping, Summer, Swimming, Smiling......
I love rubber stamping (and of course Stampin' Up:-)) and my lovely two sons.
U - Unforgettable - Are the holidays we love to go on. We LIVE to go on holidays, whether
its here in England or Abroad. We really enjoy driving in Europe at the moment.
We enjoy Castles and Chateau's anything Old....Don't you just love History......
E - Everything about my Family. My Fantastic Hubbie and Sons mean absolutely
EVERYTHING to me.....
Thats me!
I now tag
Janette, www.cardsandchat.blogspot.com
Michelle, www.wifeyscraftingcreations.blogspot.com
Caz, www.stampingcaz.blogspot.com
Mo, www.justmakinacard.blogspot.com
Emma www.emmascraftshed.blogspot.com
And anyone else who wants to play.
Have a great evening,
Jenny:-)xx
Thursday 31 January 2008
 Posted by
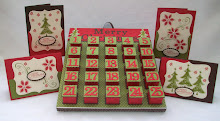
The Addicted Ladies.....

Just look what my lovely craft buddies got me for my birthday to carry all the stampin' up products around to the workshops......
Aren't they so lovely........Thanks alot Girls.
Jenny:-)xx
They both together have over 56 pockets - Hope I don't loose anything!
Wednesday 30 January 2008
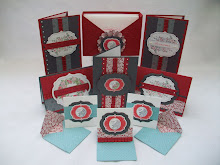
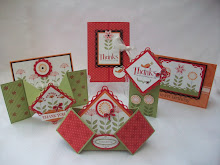
More Pick a Petal.....
 Brrrrr! Its cold outside in my craft room....
I didn't get to play yesterday as my computer was playing up and it wouldn't let me upload anything on Blogger!
I just saw the mouse again climbing up the honeysuckle to get the bird food I had hidden in there.....I love animals but if I see that mouse in my craft room, I will be chasing it with a broom like the old lady in her pinnie - from Tom and Jerry :-)xx
He would have a field day with my beloved cardstock......The food is now moved to another place.
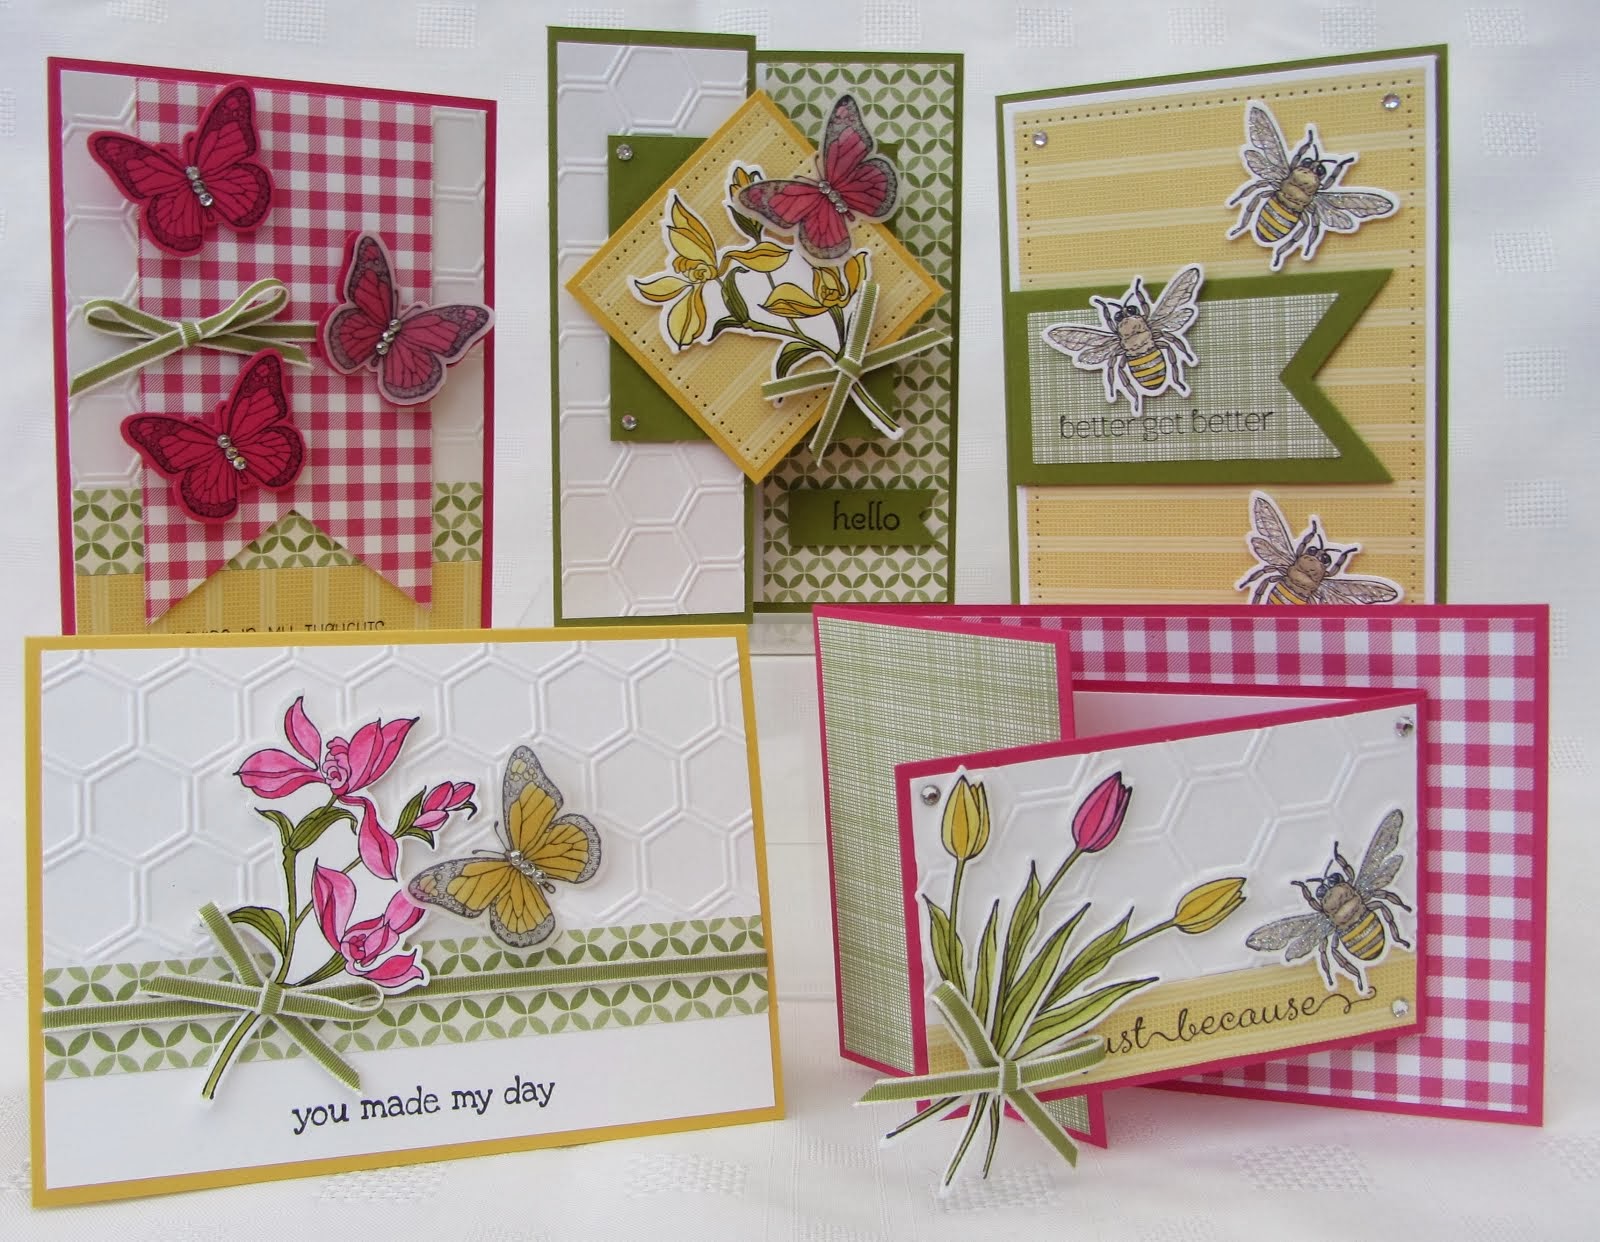
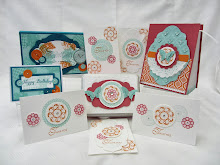
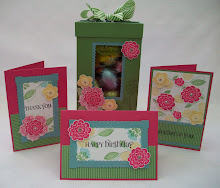
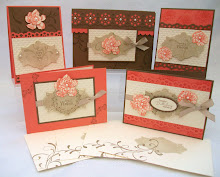
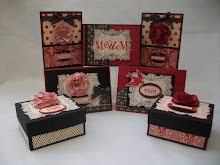
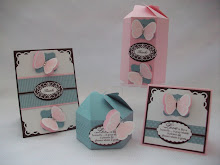
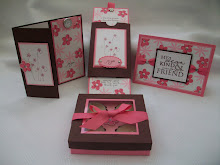
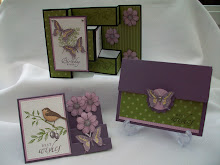
I did worn you that I thought a PINK week was coming your way -
The first card is Pink Passion base, half of a sheet of cardstock folded in half - UK A5 size.
I used the stamparound wheel Petals with an uninked cartridge which I filled up with versamark ink. I ran this all over a piece of whisper white cardstock and embossed it with clear embossing powder. The stampin' up embossing powder is very fine, it could even be like the Detail sort! Then I used the Pretty in Pink inkpad with a Brayer and Brayered all over the top. I wiped off the excess with some tissue. Out pops the embossed petals......
Next I stamped over the top in Pink Passion the petals from the Pick a Petal stamp set. I just love the whisper white cardstock, the ink soaks right into it. I layered this piece onto some more whisper white and added a flower, jumbo eyelet and rhinestone brad. The Happy Birthday stamp is from the Ocassional Greetings stamp set.......

The base cardstock is again half a sheet of Pink Passion. I used the cuttlebug embossing folder tiny bubbles for the background. I stamped the spottie petal in Pixie Pink 6 times on whisper white and went over them in Pink Passion with the other petal. The 2 flowers and hat pin is from the Pretties Kit. I added a huge clear button in the centre after stamping one of the circles that come in the Pick a Petal stampset.
The ribbon is not SU - Its from Newbury craft show last year. I used the same Happy Birthday stamp again as above.
Hope you have a great day, I'm off to see a horror movie with my hubbie later. I think he chooses them on purpose to see me jump!
Thanks for looking,
Jenny:-)xx
PS. The answer was the PJ's! Our family love to have PJ's days and watch movies all day and do no work!!!
Monday 28 January 2008
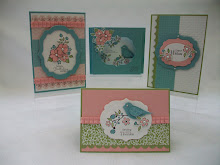
3 More Cards I received....
 I just got some more batteries for my camera, that Camera eats batteries for Dinner....!
The first one is from my Best Friend - We have known eachother for over 23 years and I love her to bits - Thanks Sharon xx
I love this stamp - My friends know why and they laughed at me! Can you guess why?
This lovely card is from Sue, another clever lady from the Dorset Stampers Club. x


This card has come all the way from USA, from my Birthday Twin........ Thanks Cami xxxx
Thanks for looking,
Jenny:-)xx
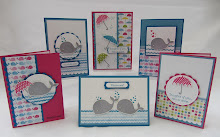
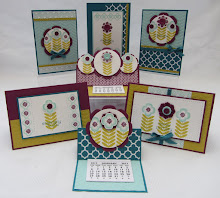
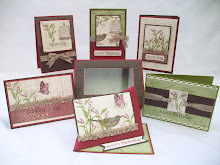
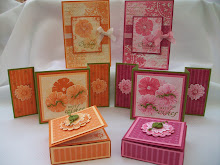
Pick a Petal....First Play.

Sorry not much to show today, I've tons of work, work to get done this week....
I've been trying to upload another video I made but it just will not load on properly. I will keep trying.
I haven't played with this set before and I think I have a pink week coming up! These were my first two Stampin' Up pinks I brought and still love them, but I have been working my way through the rest of the fantastic colours.
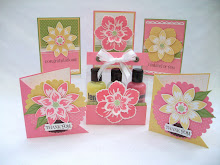
The stamp set is Pick a Petal. The base card is 14.5cm x 14.5cm square in Basic Black. The rest of the cardstock is Pixie Pink, Pink Passion and Whisper White.
I stamped the spotty petal in Pixie Pink 4 times and then went over them with the outline petal in Pink Passion. I cuttlebugged the right hand side with the spots and dots embossing folder. The centre flower is Pink Passion stamped on the Whisper White cardstock and cut out then a pink rhinestone brad was added. The sentiments are circle of friendship and stem sayings stampsets. I used the 1"circle punch for the Circle of Friendship stamp, then the 1 1/4 circle punch for the next circle.
The punched flowers are the Three for You tin set. I used some cloud scissors to make the large scallops and then the crop a dile to add the black eyelets. A tiny bit of ribbon was added to finish the card off.
My youngest son has been home ill today, so the Craft Room has had a quiet morning!
Thanks for looking,
Jenny:-)xx
Sunday 27 January 2008
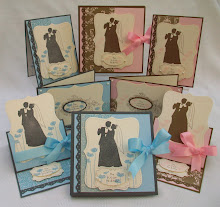
Some Cards I received for my Birthday....
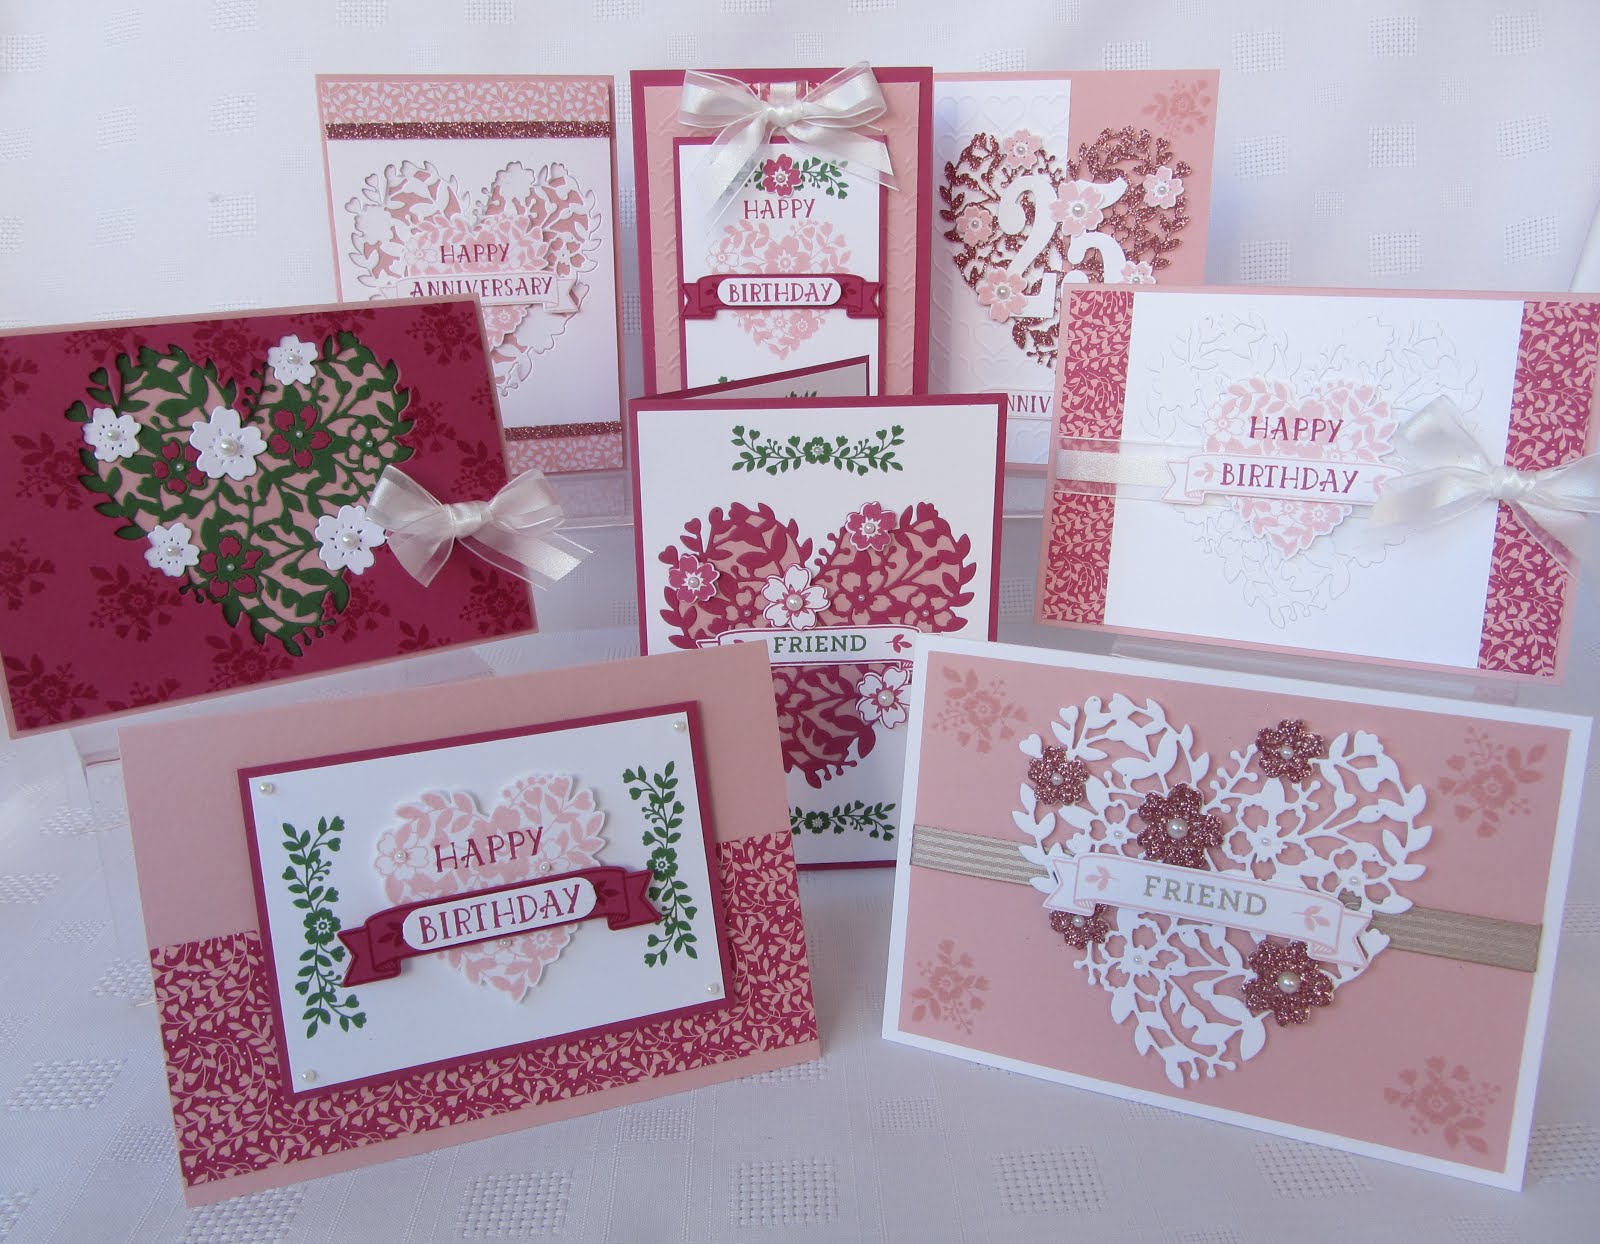
 I thought you would like to see some of my handmade birthday cards I have received for my birthday....
My batteries have ran out so I will put the rest on tomorrow.
This is the one from my DH - I joked with him that it was handmade!!!!! xxxxxx
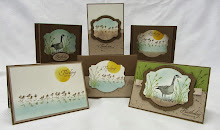
These are the beautiful flowers from my 3 boys!

 These are from the Dorset Stampers Ladies and Ken our only Man.
These are from Roseanne, Ken and Christine K
This beauty is from Val.


These are from Lesley, Jean & Yvonne.
Aren't they all very talented ladies, the detail on all of them is amazing and I am so very grateful to have received such wonderful cards from my lovely craft buddies.....
We had a great time in Bath, we saw a celebrity Justin Lee Collins from the Friday Night Project. That makes 3 celebrities in one week, including Shelli Gardener! I for the life of me can't think of the lady's name we saw on the train home and its really bugging me.
Thanks again,
Jenny:-)xx
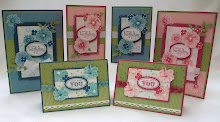
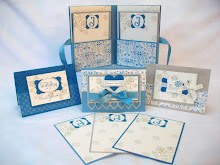
Some More Cards I Received....
 This is from my friend Tracey, what a lovely design xxx
These are from Phyllis, Janette and Linda xxx


These are from Mum&Dad in Law, Sister in Law, and my 2 sons.....

This beauty is from my friend Mary...
These are from Jan & Joy.....Such a lot of work gone into all these beautiful cards - Thank you all very much.
Jenny:-)xx

Saturday 26 January 2008
SPECIAL STAMPIN' UP OFFERS - FEBRUARY
Just found out - the Special Promotion for February.....
2-Step Stampin'! Dates: 1– 29 February 2008
Promotion Details:Purchase £35 of Stampin’ Up! products, and get 25 percent off one of the following 2-Step Stampin’ sets:
Item Number Description 25% Off Price
105755 Mixed Bouquet £21.71
109439 Big Bold Birthday £20.21
104014 Shapes & Shadows £22.46
Things to Remember:
Limit of one 25 percent-off stamp set for every £35 spent.
For example, if a customer spends £35 in regular merchandise, she may purchase one of the three discounted stamp sets.
If she spends £70, she may purchase two of the three discounted sets, etc.
Orders may be placed on a customer, workshop order.
All orders must be placed by Friday, 29 February 2008, to qualify for this promotion:
Phone: 4:00 PM (CET)
Just thought I would let you know of this Special Offer coming up in February. This is a Stampin' Up Special Offer - I will be also doing another Special Offer on the 1st February so look out for it......
Thanks for looking,
Jenny:-)xx
Friday 25 January 2008
Stamping Up Open Night London....

I am so tired this morning after a full day up THE LONDON! as my family call it....
I dragged my two craft buddies up there with me, the poor souls - How do they put up with me? We had a lovely lunch in Victoria & Albert Museum. Its a grown up Museum and it was nice to take a slow pace around there for a bit, you never get to see the full Museum, theres so much in them. The lunch room is the most beautiful place with large Lighting Balls hanging from the ceiling. The room is sort of round and completely tiled in wonderful old tiles, with a huge fire place in the centre. We then moved onto the Natural History Museum which is more for very one really. The building itself is amazing alone.
We went on to the Hotel and it was quite a small affair really. We were all very retrained and no screaming was being done! We got to make 2 cards and watch Sheli demonstrate one of the stamp sets. Which I must add the flowers in that set, were a shock as when you stamp with them in just one ink colour when you stamp on the card it changes - Wow didn't know that.
We managed to get a taxi back to the train station and got a reasonable time train home. We had completely worn my best friend Sharon out and she slept most the way home.
I don't think I will have anytime to stamp over the weekend as when I got home my lovely hubbie and boys have arranged a full programme for my birthday this weekend - I will be 40!!!
They are so good to me and I am very lucky. Tonight I am going to the Theatre to watch a play and then tomorrow, we are booked into a hotel in Bath and they are taking me shopping!! They booked it all by themselves and even my sons kept it quiet for a surprise.
Anyway enough of me rambling on,
Thanks for looking,
Jenny:-)xx
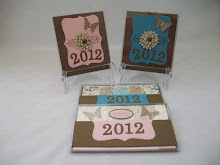
Wednesday 23 January 2008
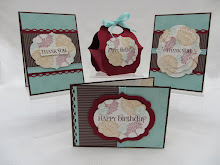
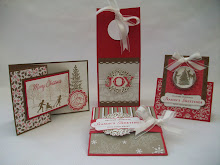
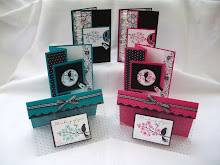
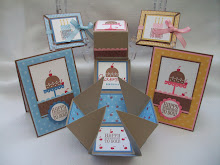
Big Bold Birthday Z-Card

Just a quick little card to show you today...
Another Z-card using the Big Bold Birthday stamp set - Its very Girly isn't it.
The base card is Tempting Turquiose. Half a sheet folded in half and the fold folded back to the left hand side.
The other card used is Pretty in Pink and the Petals & Paisley designer paper pack.
I stamped the Birthday cup cake top and bottom on Whisper White with Pretty in Pink and Tempting Turquiose inkpads. The candle and the Happy Birthday was stamped straight onto the Whisper White before I cut out and mounted using 3D Foam pads. The sticky back crystals are not SU they are from the Market Gallery...
I added some tempting turquiose ribbon to the left hand side before I added the centre piece.
The scallop circle, 1 3/8 and 1 1/4 circle punches were used to hold back the centre image.
I have another workshop today before going up to the Stampin Up London Open Night tomorrow. Shelli Gardner will be there so its all very exciting. I am going with 2 of the addicted ladies and I am going to drag them around the Natural History Museum beforehand and if we have enough energy we might pop into Harrods.
Thanks for looking,
Jenny:-)xx
Tuesday 22 January 2008
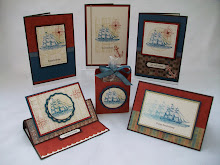
Carte Postale Z-Card.....
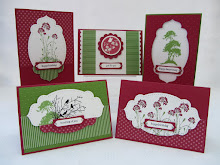
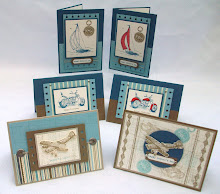
 This is the card I demonstrated at Yvonnes Workshop today...
Another Z-card, you know how I like these...
The base card is Chocolate Chip. Its half a sheet of cardstock cut down the length. Its then folded in half and the front is then folded back on itself.
The next cardstock is Rose Red and the Designer Paper is also Rose Red.
The stamp set is Carte Postale and the senitment is one of the warm words from a Level One Hostess Set. I used the 1/2 circle punch to take out the corners of the front layers. I used Rose Red and Chocolate Chip inkpads, then the pricking tool and mat to go along the top and bottom.
This is taped on the left hand side only, see next piccie. Some 5/8" ribbon was added with a knot to the left hand side.

The scallop circle is what holds the card shut. Only put a couple of 3D foam pads on one side so that the centre piece slips behind it.
The scallop circle was done in Rose Red, then 1 3/8" circle is Chocolate Chip and then the flower is stamped in Rose Red on whisper white and punched out using 1 1/4" circle punch.
I added a small piece of whisper white and stamped the little flower sprays in two corners.

This is a close up of the scallop part. I pricked in each scallop as well. A dot with a white gel pen would look nice as well.
Got to bake some more cakes, the 3 boys in my household have worked their way through the load I made on Saturday. Wouldn't mind but I only got to eat one, they were eating them as they came out of the oven!! Little Monkeys......
Thanks for looking,
Jenny:-)xx
Monday 21 January 2008
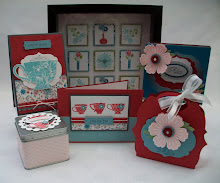
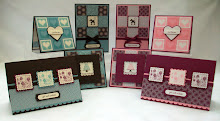
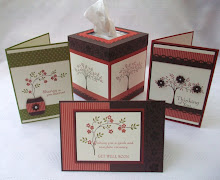
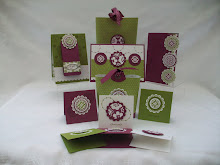
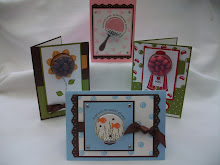
Polka Dot Slider Card......
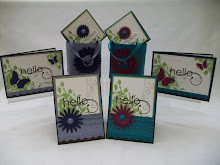
 I am taking along some of my Stampin' Up Goodies to Craft Club tonight and this is the card I am going to demonstrate.
I wasn't sure whether I could still make one as the slot punch isn't in the UK catalogue yet, but I found that the 1/4 square is the same size as the 1/4" grosgrain ribbon - It works fine - Phew!
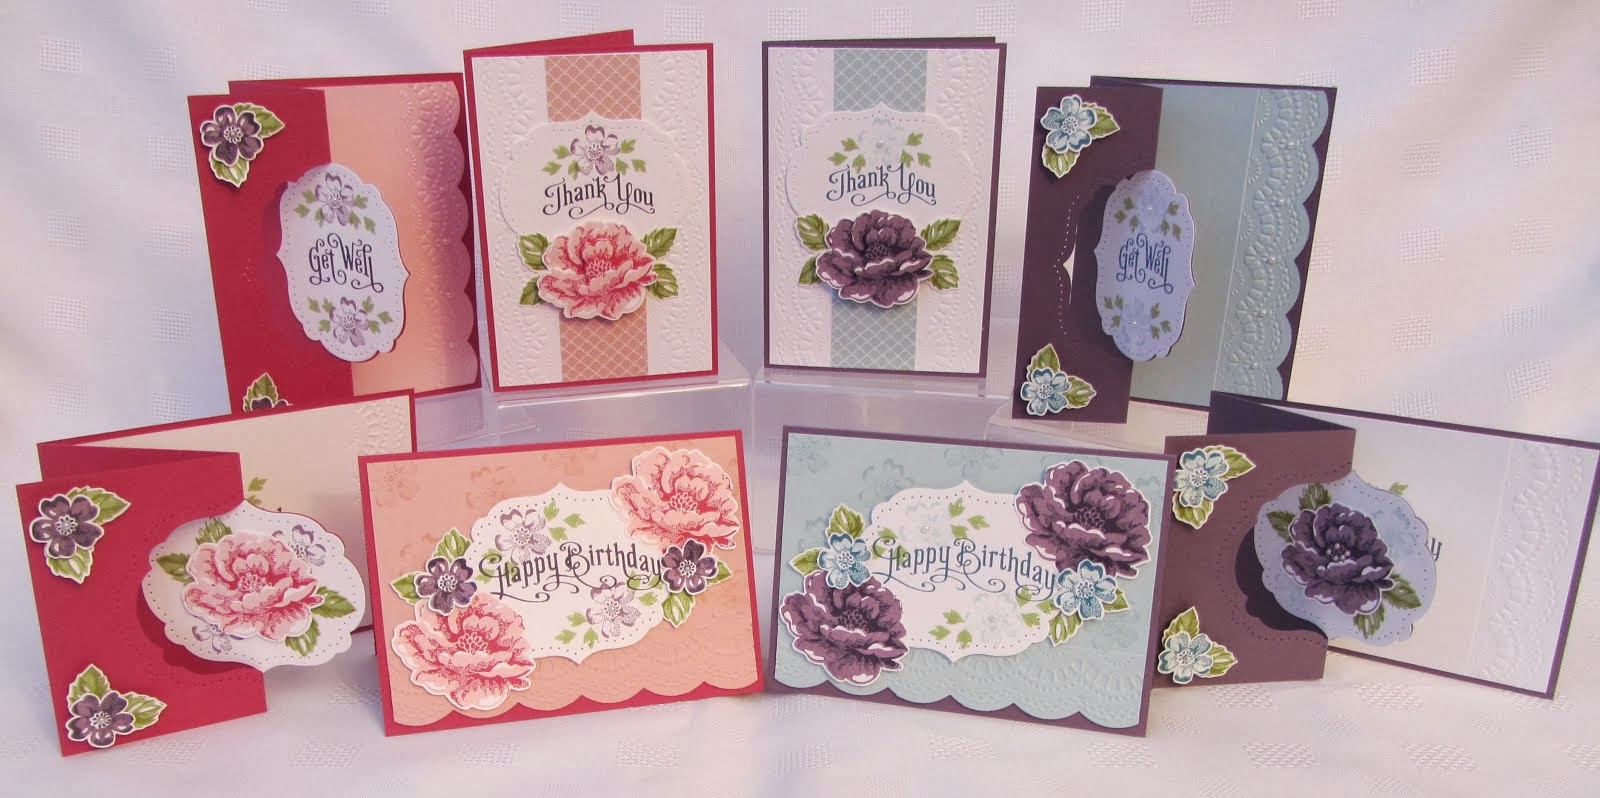
What do you think of these two colours then?
Elegant Eggplant and Orchid Opulence.....
The Base is 21cm x 10cm scored at 10cm and 20cm leaving 1cm as a tab to make the cover.

I used some double sided tape on the 1cm and stuck the front down. I then stamped in Elegant Eggplant with the background stamp in the Polka Dot & Paisley stamp set just in two corners.
The next layer is 7cm x 7cm in Orchid Opulence. I used the Round Tab Punch to cut out the circle in the next layer of Elegant Eggplant and stamped all over with the flower head.
Next layers are scallop punch, 1 3/8 circle, 1 1/4 circle, 1" circle. I stamped the tall flower first on whisper white in Orchid Opulence and then used the Stamp a ma jig to postion the flower head stamp over it in Elegant Eggplant. A rhinestone brad was added. I layered them all together with foam pads on the third layer.
For the insert/slider part:- The first layer is 9.5cm x 9.5cm in Orchid Opulence and then a piece of whisper white 9cm x 9cm, I used the corner rounder on two of the corners that will show (2 right hand ones). I stamped down the right hand edge in the two colours with the tall flower and then the sentiment, which is the Sincere Salutations.
I used the 3/4 circle to punch out the half circle where the ribbon is pulled from and the 1/4 square to thread the ribbon through
To put the card together:- Cut a piece of ribbon 40cm long or how ever long you are comfortable tying a knot with. Thread the ribbon through the square punched out hole from the front and out the back. Place the insert inbetween the ribbon and push back inside the card until it reaches the left hand side now tye the knot. Card complete......Pull on the knot to slide the card open.......
Have a try, it is easier than my instructions sound, there is another slider card on my blog to look at as well.
Thanks for looking,
Jenny:-)xx
Saturday 19 January 2008
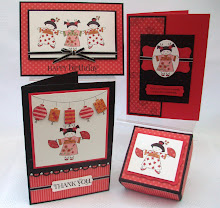
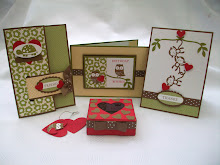
Simply Said Bookmark Card/Keepsake.....
 Sorry this post is later than normal, I've been doing loads of baking today. Has anyone got some of the new silicone baking trays, they are brilliant. Theres a new cooking shop near us and they have them on offer at the moment and I thought it would be great for the boys to take to school - homemade cakes - not the silicone trays.
Back to cardmaking! This is the card we will be making on Monday Evening at Craft Club - I am taking all my Stampin' Up Goodies along to show.....
This card is also a Bookmark. The base cardstock is Ruby Red, 21cm x 14cm perforated at 15cm, leaving a 6cm Bookmark on the right.

For the bookmark, I stamped all over a strip of whisper white cardstock in More Mustard and Ruby Red with 3 flowers from the Simply Said Stamp set.
I added a scallop circle in Basic Black, then 1 3/8 circle punch scored in half and taped over the whole of the top. I used the crop a dile to cut and set the Jumbo Eyelet antique copper.
I added some Black ribbon (not SU) and then some More Mustard ribbon. The For You sentiment is from the Occasional Greetings set.
This is a close up of the top of the bookmark.


You can just see the perforation for the bookmark to be taken off. To do the perforation I used the Rotatrim (thanks Janette!) or you can use the perforator tool in the SU cutter kit, but I have 25 to do so it was quicker to use the Rotatrim.
For the Card part. I stamped the left hand side with Ruby Red ink and the Canvas Background stamp.
I added a strip of black which I punched with the spiral punch down one side.
Then I stamped the flowers in Ruby Red and the sentiment in Black with some more More Mustard ribbon. Added some More Mustard cardstock and some foam pads to lift it up.

Thats me done, just all the packs to make up now.
Thanks for looking,
Jenny:-)xx
Friday 18 January 2008
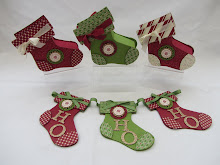
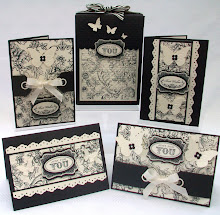
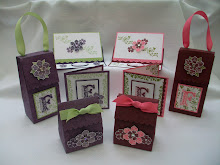
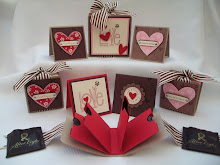
Simply Said Thankyou Gifts......
 I've just finished stamping out 30 of these little hearts for some Thank you gifts for my workshops next week....
I used the Simply Said Hearts, theres 3 in the stamp set and I used my new best friend - the Stamp a ma jig - to stamp the 2 middle hearts in the centre. Istarted with the outside one using Basic Black inkpad, then the solid heart in Pretty in Pink and then the flower heart in Real Red.
The scallop heart is a Woodware one (2" Blue one) punched out of Real Red.
I used the cuttlebug heart embossing folder to make the top of the bag.

This photo just makes me laugh!!! The choc's look like 2 -----! Hee!
A clearer view of the hearts.
I am trying to get the card we will be making at the Craft Club Workshop finished, when I do I will upload it....
Until then, Jenny:-)xx

Blog Candy Winner......

Thank you all ever so much for leaving a comment for the Blog Candy Moment....
All the different colour combinations are just so inspiring.
I am just so in love with all the colours and its a real job just to pick a few but at the moment I love Chocolate Chip, Rose Red and Regal Rose or Pretty in Pink. I have just ran out of Chocolate Chip a full pack of A4!! But at least I know I can get it replaced ever so easy now - being a Stampin' Up Demonstrator.
The Random Generator picked.......Tejal
So congratulations, send me an email and I will get your goodies straight off to you.
I am trying to get a couple of projects started and finished today before the light goes as my photos have been rubbish lately, then I will post them.
Until then, hope you all have a lovely day,
Jenny:-)xx
Wednesday 16 January 2008
Blog Candy Moment....

Wow! I just can't believe you are still coming back to look at me messing around with my craft bits and bobs....
Thank you from the bottom of my heart for all the lovely comments you all leave.
Right for this Blog Candy the goodies are as follows:-
1 Pack of 8 x8 Papermania colossal paper, Basic Vibrant
2 sheets of sticky backed ribbons from Anitas
2 sheets of Dome Stickers one sentiments and one flowers.
1 sheet of Rub ons from papermania
and last but not least a packet of ribbon brads - Flowers.
To Enter just leave a comment to the following Question:-
What are your favourite Colour combinations for your cardmaking?
So leave a comment to enter and I will draw a winner on Friday 18th January by the Random Org Generator at 9am UK time.
Thanks for looking,
Jenny:-)xx
Tuesday 15 January 2008
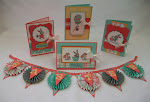
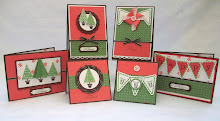
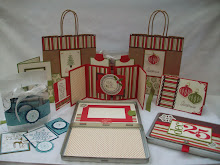
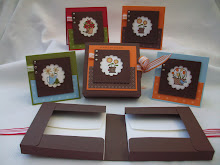
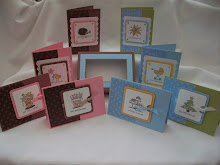
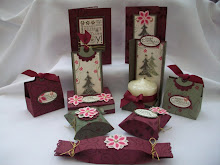
Tag Punch Star.....
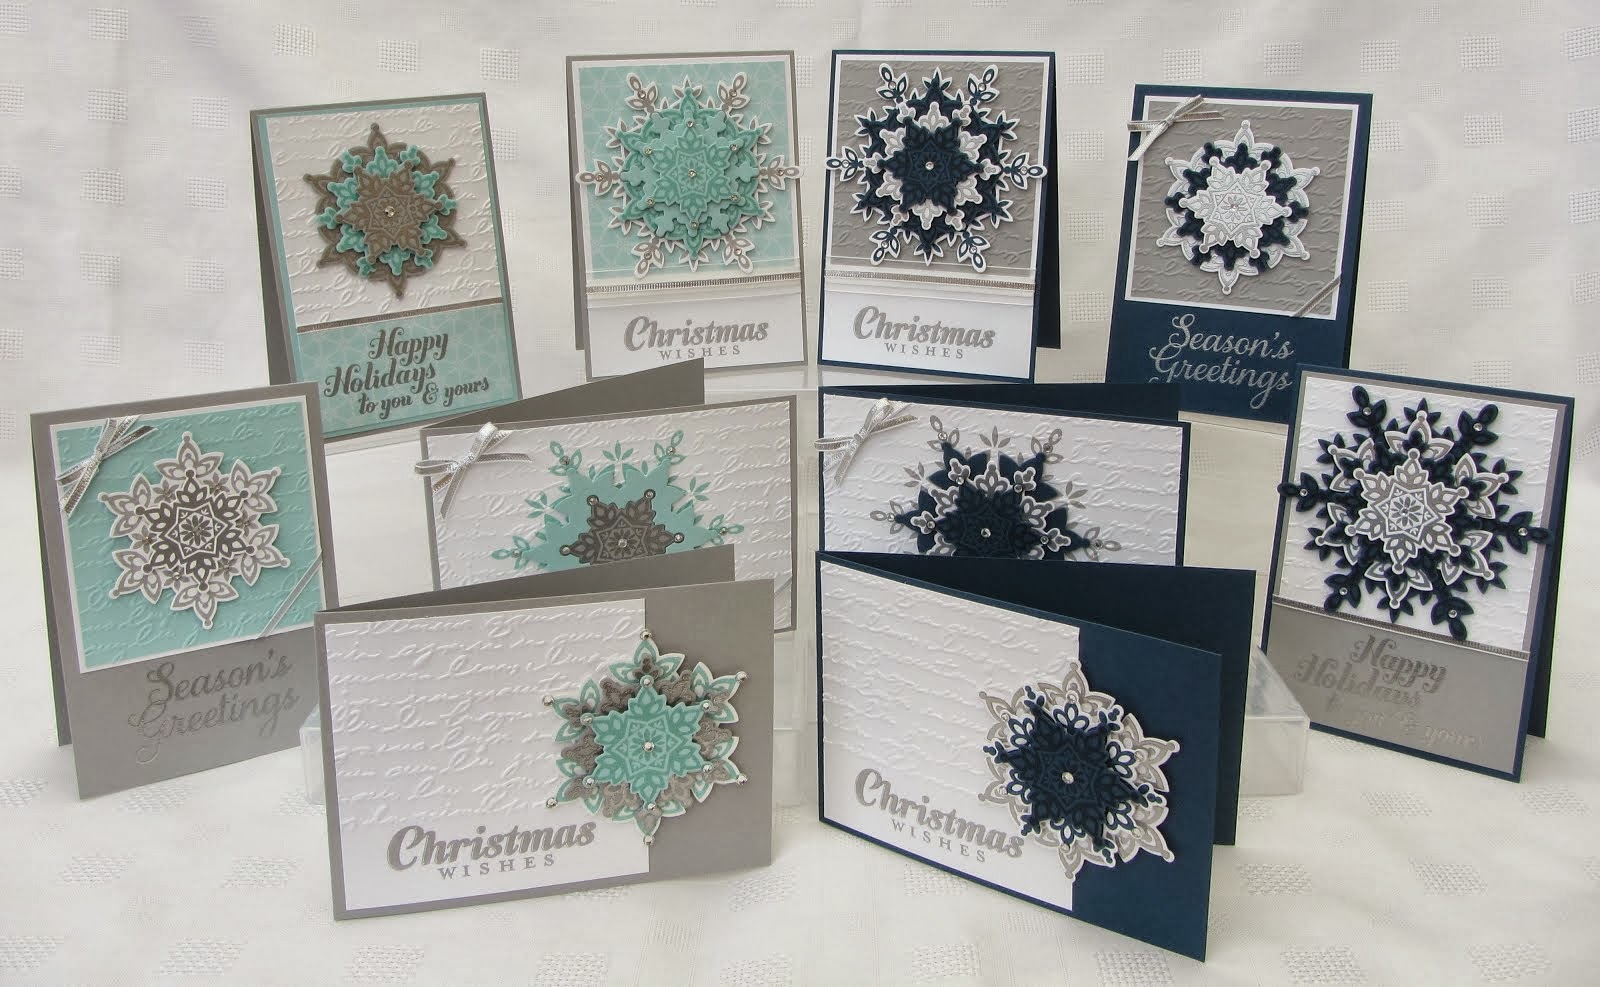
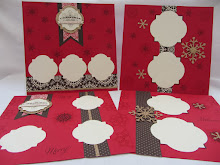
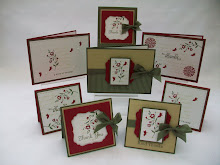
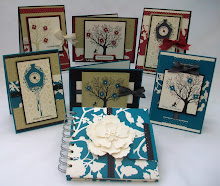
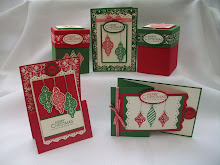
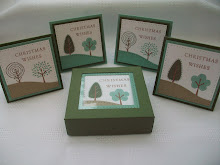
 I know its not Christmas now, but I am determined not to leave all my Christmas Cards to the last minute this year!
Thats my aim at least!......
This star is made using the two different sized punches from Stampin Up.
You can find the tutorial on Splitcoast stampers under resources.....
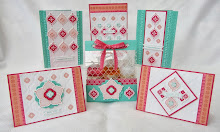
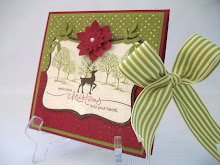
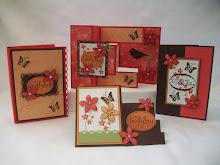
The first card is Sage Shadow, whisper white cardstock and wintergreen designer paper. The star was punched out in Glitterboard cardstock not from Stampin' Up. The snowflake is from the Perfect Presents stamp set and the sentiment is from the Seasonal Wishes stamp set.

This card is Bordering Blue and Whisper White cardstock. The background is the cuttlebug embossing folder snowflakes.
I stamped on whisper white cardstock with the Background Dots stamp in Bordering Blue. The star was punched out in Bordering Blue and layered onto the stamped whisper white card.
The centre and tag is from the Perfect Presents stamp set and a ice rhinestone brad was added for the centre. I added some Dazzling Diamond glitter around the edge of the star.

The base for this one is Real Red and then Mellow Moss and Dashing Designer paper.
I stamped on vellum cardstock with Real Red with the Dots Background stamp. This was lovely to cut out.
I added a rhinestone brad for the centre. The sentiment at the bottom is from Flakey Friends, the photo doesn't really pick it up - Its raining and dark at the moment.....
All 3 of them - I made these to show at my Workshop today.
Check back later as I will be doing some Blog Candy later as I see the counter has gone over 40,000 Hits! I'm 40 this month so its 40 all round.....

Have a lovely day,
Jenny:-)xx
Sunday 13 January 2008
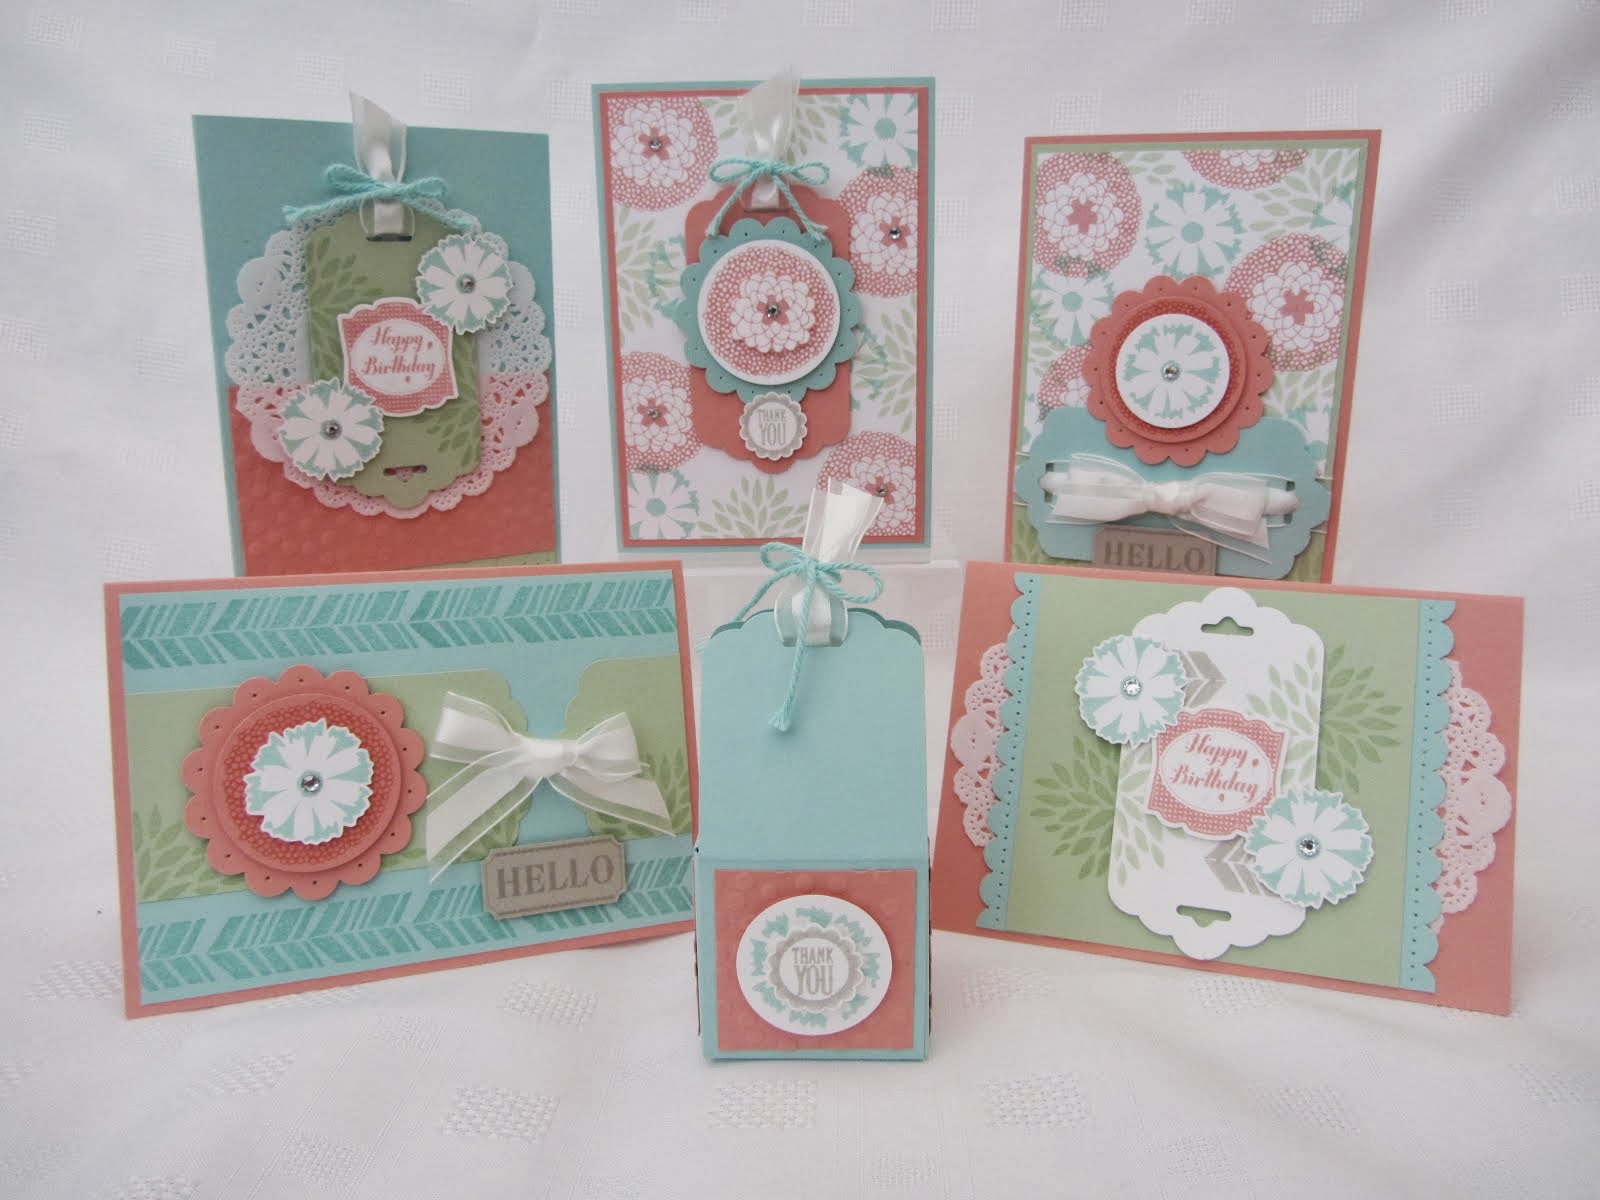
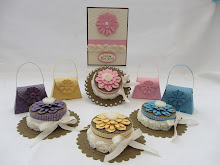
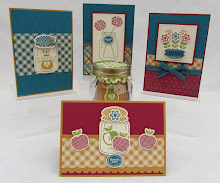
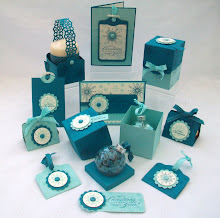
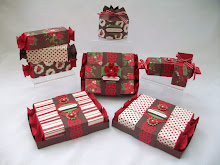
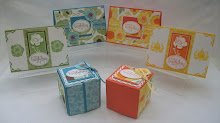
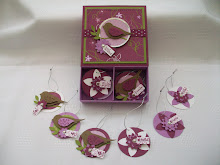
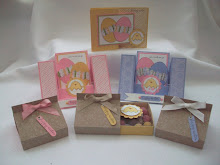
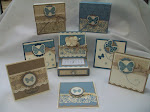
Scallop Chocolate Gifts.....
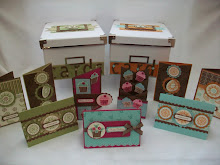
 I finished making this bucket of thank you chocolates to give out at my workshops this month. Mmm Chocolate! I only ate 3!!!!
I used the scallop punch, 1 3/8 and 1 1/4 circle punches . The stamp set is Seeing Spots in Pretty in Pink and Certainly Celery ink also in the same cardstock.
It was so easy and quick to stamp a whole sheet of whisper white cardstock, with the Stamp a ma jig to position the little flower dead centre in the circle of words.


More views.
I thought the scallop could be taken off the chocolate gently to save and put on a couple of cards are add them to a tag for a gift.
These are the chocolates I used Mint Elizabeth Shaw chocolates.

Happy Stamping,
Jenny:-)xx
Mojo Gone? Stuck for an Idea?........
Sometimes you just need a bit of help......
I've added a list of the Splitcoast Stampers Weekly Challenges on the right hand side.
So if your Mojo has done a runner! Or you just do not know what piece of Craft Goodie to use next, click on one of the 5 links and there you go a whole wonderful world of ideas.
The recent challenges are listed as well and you can view the Galleries of all the wonderful cards the talented ladies have uploaded.
Enjoy!
Jenny:-)xx
Yes the clock is correct! I'm up at this hour coughing my heart out! And whats the first thought that comes into my head - Get that computer on! Hee!....Back to Bed now for me.
Saturday 12 January 2008
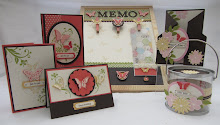
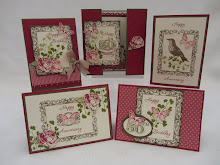
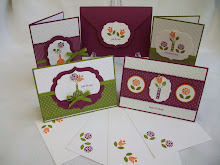
Beates Weekend Challenge #30

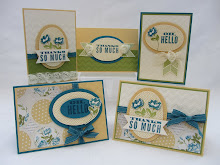
The lovely Beate is back with her Weekend Challenge. I love doing the sketches as sometimes its just nice to do a card going by a layout and not having to think too much!!!!:-)
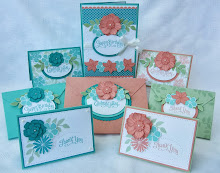
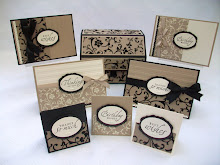
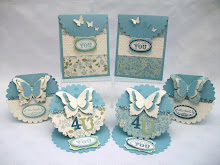
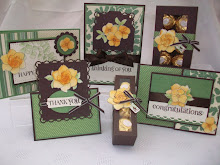
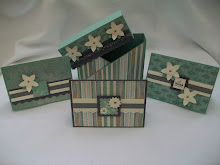
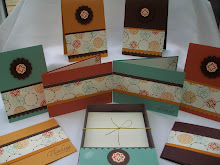
For this card, I had already been playing with the gorgeous Petals & Paisley doublesided paper set from Stampin Up. The colours are so Yummy!
The cardstock used are Taken with Teal, Old Olive, So Saffron and Very Vanilla. The inkpads used were the same except very vanilla.
The base card is 14cm x 28cm folded in half in Taken with Teal. Then Old Olive and So Saffron, which I did some faux stitching with the pricking mat & tool and went over with the white gel pen. The strip of So Saffron was cuttlebugged with the Tiny Bubbles embossing folder edged with some Old Olive cardstock.
The flower is from the Mixed Bouquet stamp set and also the leaves on the bottom right hand corner. The scalloped circles are the Petite Scallop in Large Nestabilities. The small one from this size fits inside the SU Scallop Punch beautifully. The flower was stamped in So Saffron on the Very Vanilla cardstock twice and a Jumbo Antique Brass Eyelets was added with an Ice Rhinestone Brad.
The sentiment in Taken with Teal was from the Sincere Salutations stamp set.
If you are stuck for ideas pop over to Beates Blog as all her sketches are on there. Enjoy!
When I get to 40,000 Hits I will be doing some Blog Candy.:-)
Hope you are having a nice weekend,
Jenny:-)xx
Jenny
Friday 11 January 2008
Punches Keyring Little Helper.....
 I saw this idea on splitcoaststampers site. I made one to use. I cut up 4 strips of cardstock in Orchid Opulence and stamped all over with the 2 flowers from Simply Said stamp set.
I used the Jumbo Eyelets and crop a dile to attach them to a Bookring (from Staples).
I punched all the stampin up punches and then ran the strips through the xyron machine with the laminating cartridge.


I can now lay this over the stamped images and see which punch goes with which stamp set or stamped image.
Have a go and make one.
Thanks for looking,
Jenny:-)xx
Faux Stitching Video
Just thought I would show you how I do the faux stitching on my cards.
Let me know what you think? Should I give up the day job?
Thanks for looking,
Jenny:-)xx
Edited - to say the crafters tool kit is available in the UK stampin' up catalogue. Thanks
Thursday 10 January 2008
I need help!
I have tried all yesterday evening to upload a video I made but it just will not load up. I will play about with it again tomorrow and try again!
Thanks Jenny:-)xx
Thanks Jenny:-)xx
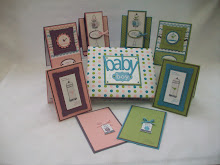
Wednesday 9 January 2008
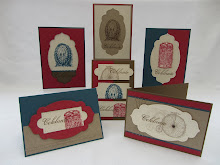
A Big Bold Birthday Wish.......

Just playing about with the nestabilities again. I saw a card the splitcoaststampers site showing holes cut in the scallops of the nestabilities but can't remember who it was. Memory getting bad!!!
Anyway I wanted to have a go so warmed up the craft room today, but not for long as me and my hubbie are going to the Movies in a moment..... A Date :-)
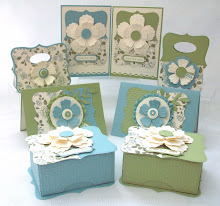
The stamp set is Big Bold Birthday in So Saffron and Bordering Blue. The flower from that set was stamped in Rose Red. The cuttlebug embossing folder is Happy Birthday. Very Quick and simple card.
A Big Bold Birthday Wish.......
 This is the large scalloped rectangle nestabilitie die. I cut and embossed it with my Big Shot in the cardstock So Saffron and Bordering Blue.
Then punched holes in each scallop with the hand held punch from SU 1/8 circle one. Added another rectangle behind this for a shadow.

 This is a close up of the holes.

I used the 1/4 circle punch for the circles behind the silver brads.
Hope you have a great day,
Jenny:-) xx
Subscribe to:
Posts (Atom)